One spring, I talked about how
to make invisible seams on vertical stockinette
stitch and garter stitch. Perfect for sewing
the front to the back of a sweater. Remember
that? No? Might want to check it out for "general
principles of seaming" since I won't be repeating
them this time. Except for "block first" since
you really want to block first. Seriously. Block
first.
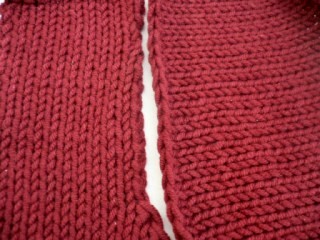
But what if you want to sew the sleeves
onto a garment? You've got a row of vertical
stitches - the stitches on the body of
the sweater - that will have to be matched
up to a row of horizontal stitches Ð the
ones on the sleeve, and that's a whole
different can of worms.
Let's
take a moment and consider stitch vs.
row gauge. Grab your nearest pattern or
yarn label and check out the gauge. The
row gauge is nearly always a slightly
higher number than the stitch gauge -
something like 4 sts/6 rows = 1 inch or
16 sts/24 rows = 4 inches. In other words,
there are more rows in each inch of knitting
than there are stitches Ð therefore you
can't just match up one sleeve stitch
to one body stitch, because it won't come
out right.
Basting
Before
seaming, you might consider basting the
sleeves onto the body of the garment to
line the sleeves up just so and make sure
it fits the way it should.
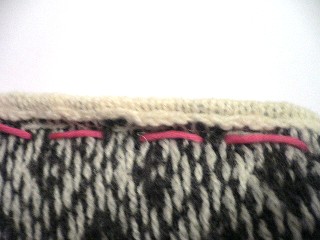
Place the right sides together. Using
a contrasting (and thus easier to remove
afterwards) length of yarn threaded on
a blunt tapestry needle, insert the needle
close to the edges, back and forth through
both thicknesses.
(Basting could also be used as a way
to seam, but it is neither stable nor
attractive enough to recommend.)
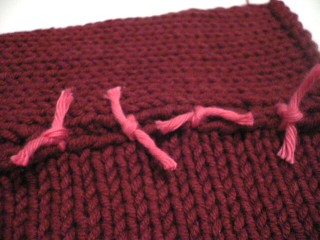
Once the sleeves and body are basted,
try it on. Does it fit the way you want?
Are there puffy sleeves when there shouldn't
be? Do the pieces lie flat and even? If
so, attach the two peices together (pin
or tie with small lengths of spare yarn,
as below) at regular intervals to guide
you when you're seaming, and remove the
basting thread.
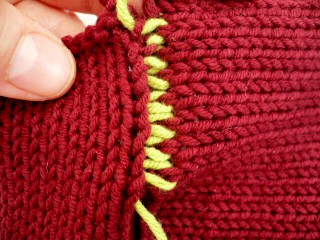
Backstitching
A
somewhat better method of seaming is backstitching.
The backstitch is also worked with the
right sides together - much in the same
way as basting - but overlaps by starting
next stitch at middle of preceding one
and thus makes a stronger, if a bit bulky,
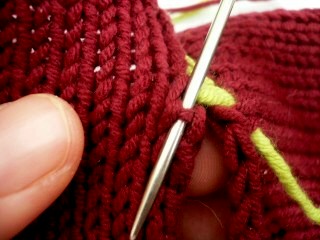
seam. To backstitch, you'll want to use
either the yarn you've knitted the garment
with or, if it's a thick yarn, a thinner
one in a matching color. I've used a contrasting
color yarn in the following pictures to
make it easier to see what's happening.
Insert the needle through both thicknesses...
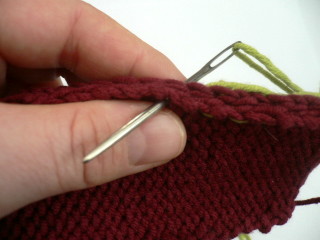
Then
reinsert the needle near the point where
the yarn went through from the previous
stitch. Keep moving forward a couple of
stitches at a time and try to keep the
stitches even and straight.

Backstitching is be a good choice to
use when you want to hide less than perfect
selvedge stitches. It's also a good method
for sewing sleeves into steeked armholes.
Do the backstitching in the first "neat"
stitch in from the edge. You might consider
running a basting thread loosely through
the knitting one more stitch in from where
you'll want the backstitching to be to
act as a guide if the stitches are difficult
to see.
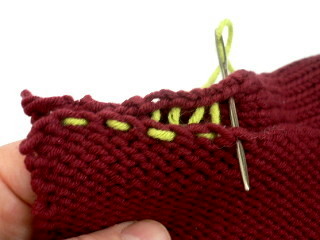
Invisible
vertical to horizontal seaming
A
better method of seaming is weaving. It's
quite similar to mattress stitching, except
that to seam vertical to horizontal you'll
have to take into consideration the difference
between stitch and row gauge.
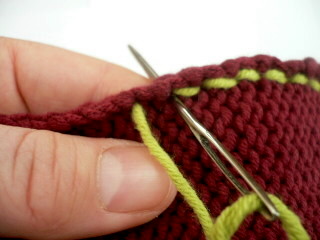
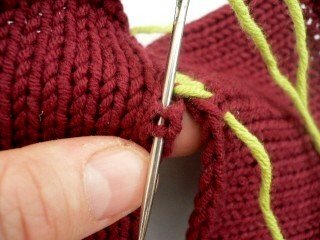
Work back and forth, inserting the needle
under the horizontal bar between two stitches
on the vertical (body) side...
Then
under a whole stitch on the horizontal
(sleeve) side..
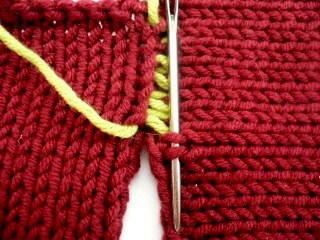
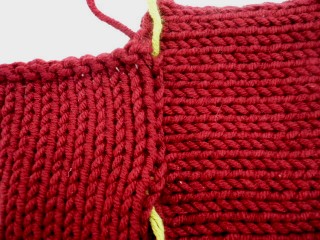
Now to compensate for the difference in stitch
vs. row gauge: after repeating the previous
two steps three times, insert the needle under
2 of the horizontal bars on the body side at
one time.
Keep repeating the previous steps: *Under
1 horizontal bar on body, under a whole stitch
on sleeve* three times, then under 2 horizontal
bars on body, under a whole stitch on sleeve
once, until you've completed several inches.
Then
pull gently on the sewing thread to carefully
tighten up the seam, so that it lies flat
but doesn't pucker.
A
few more thoughts about sewing in sleeves:
Use
a length of yarn longer than the length
of the seam. Start at the top of the shoulder
and pull half of the total yarn length
through and seam downwards towards the
underarm. When you're through with one
half of the seaming, begin again at the
top of the shoulder with the other half
of the yarn. You'll be more likely to
be consistent and the yarn you're using
to seam with won't get frayed by the time
you're finished.
References:
Vogue
Knitting
The
Knitter's Book of Finishing Techniques


