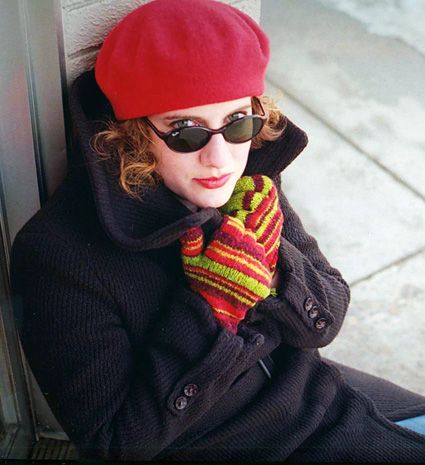
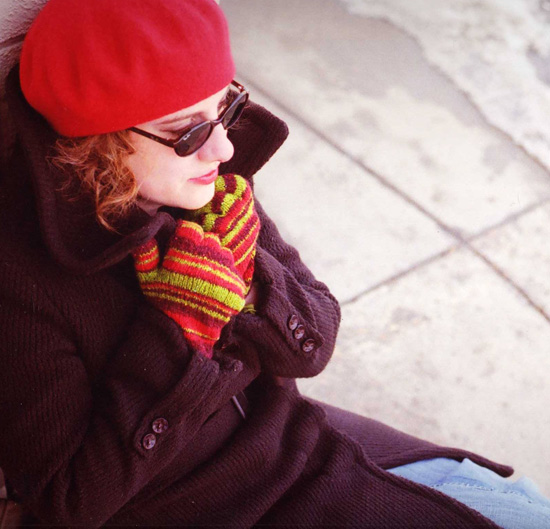
Instructions are included for both garter stitch and ribbed cuffs. The gloves shown have garter stitch cuffs.
Crocheted Seam:
Note:
In these directions, "yarn over" means wrap the yarn
counter-clockwise around the hook, near the tip of the hook,
at the back of the work.
With RS facing, insert hook into beginning of seam at base of left piece. Yarn over, draw loop through work. *Insert hook into first st of right piece, yarn over, draw loop through work; 2 loops on hook. Insert hook into first st of left piece, yarn over, draw loop through work; 3 loops on hook. Yarn over, draw last loop through first 3 loops on hook.*
Repeat from * to * for each row, matching stripes.
1x1 Rib (Worked over an odd number of sts):
Row
1 [RS]: [K1, p1] to last st, k1.
Row
2 [WS]: [P1, k1] to last st, p1.
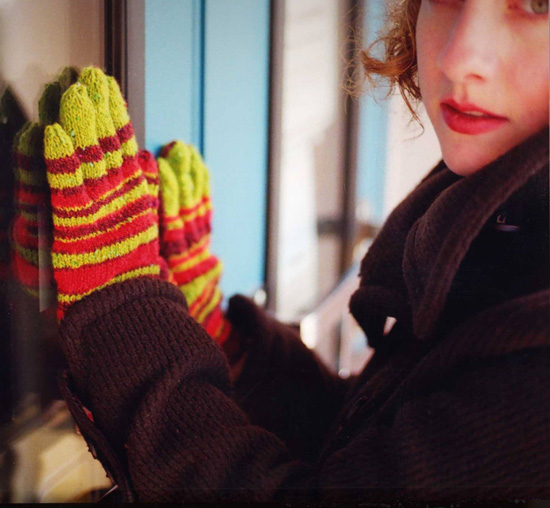
Stripe Pattern For Left Glove:
2 rows MC
4 rows CC2
2 rows MC
1 row CC2
3 rows CC1
3 rows MC
2 rows CC2
1 row MC
6 rows CC1
1 row MC
4 rows CC2
1 row MC
3 rows CC1
1 row CC2
3 rows MC
1 row CC1
3 rows CC2
2 rows MC
1 row CC2
3 rows CC1
3 rows MC
4 rows CC2
4 rows MC
CC2 to end |
Stripe Pattern for Right Glove:
5 rows MC
2 rows CC1
1 row MC
1 row CC2
5 rows CC1
6 rows MC
2 rows CC2
2 rows MC
1 row CC2
1 row CC1
1 row MC
6 rows CC2
1 row MC
3 rows CC1
2 rows CC2
2 rows CC1
1 row CC2
5 rows MC
4 rows CC1
2 rows CC2
2 rows CC1
CC2 to end |
|
  CUFFS CUFFS
Note: Cuff is worked in the same way for each glove. Work the cuff of your choice, then proceed to Right Glove or Left Glove. After cuffs, gloves are worked entirely in stockinette st.
Garter Stitch Cuff:
Using MC, CO 44 sts.
K all rows until work measures 1 inch. The next row (first row of glove) will be a RS row.
Ribbed Cuff:
Using MC, CO 45 sts.
Work in 1x1 Rib until work measures 2 inches, ending with a RS row.
Next
Row [WS]: Work in 1x1 Rib to last 3 sts, p2tog, p1. 44 sts.
RIGHT GLOVE
Note: Stripes may be worked randomly,
or worked following the Stripe Pattern. When working stripes,
do not break yarn between stripes; instead, carry
yarns not in use loosely along edge of work.
Shape Lower Palm:
Next
Row [RS]: K1, m1, k to end.
P 1 row.
Repeat these 2 rows 14 times more, then work first row (RS row) once more. 60 sts.
Note: Each finger will be worked back and forth over a portion of the sts on the needle. The remaining sts can remain on hold on the needles; they will be separated by stitch markers from the sts being worked. If you prefer, the sts not being worked may be placed on stitch holders while each finger is being worked.
Thumb:
Next
Row [WS]: P13, turn work and CO 3 sts at edge of these 13 sts; place marker. This row is base of thumb. Thumb will be worked over these 16 sts only.
Work thumb sts in stockinette st until work measures 2 inches from base of thumb or desired length, ending with a WS row.
Next
Row [RS]: [K1, k2tog] 5 times, k1. 11 sts.
P 1 row.
Next
Row [RS]: [K2tog] 5 times, k1. Break yarn and draw through remaining 6 sts. Remove marker.
Upper Palm:
With WS facing, pick up and p 3 sts along CO edge at base of thumb, beginning with last CO st and working towards point where CO edge meets rest of work. From this point, with WS facing, p all sts on needle. 50 sts.
Continue in stockinette st until work measures 4 inches from top of cuff, ending with a WS row.
Little Finger:
Next
Row [RS]: K17, place marker, k13, turn work and CO 2 sts at edge of these 13 sts, place marker; do not work remaining 20 sts. Little finger will be worked over 15 sts between markers.
Work these sts in stockinette st until work measures 2 inches from base of finger or desired length, ending with a WS row.
Next
Row [RS]: [K1, k2tog] 5 times. 10 sts.
P 1 row.
Next
Row [RS]: [K2tog] 5 times. Break yarn and draw through remaining 5 sts. Remove markers.
Ring Finger:
With RS facing, there will be 17 sts on right needle
and 20 sts on left needle. At beginning of sts on left
needle, you will see CO edge at base of little finger.
*Pick up and k 2 sts along this edge, then k first 6
sts on left needle and place marker. Turn work.
With WS facing, p these 8 sts, then p next 6 sts (at
other side of previous finger); continuing from these
sts, CO 2 sts, place marker. 16 sts between markers.
Work these 16 sts in stockinette st until work measures
2.25 inches from base of finger or desired length, ending
with a WS row.
Next
Row [RS]: [K1, k2tog] 5 times, k1. 11 sts.
P 1 row.
Next
Row [RS]: [K2tog] 5 times, k1. Break yarn and
draw through remaining 6 sts. Remove markers.*
Middle Finger:
With RS facing, there will be 11 sts on right needle
and 14 sts on left needle. At beginning of sts on left
needle, you will see CO edge at base of ring finger.
Work from * to * as for Ring Finger, working until finger
measures 2.5 inches or desired length before beginning
decreases at fingertip.
Index Finger:
With RS facing, there will be 5 sts on right needle and
8 sts on left needle. At beginning of sts on left needle,
you will see CO edge at base of middle finger. *Pick
up and k 2 sts along this edge, then k8 from left needle.
Turn work.
With WS facing, p these 8 sts, then p remaining 5 sts.
15 sts.
Work in stockinette st until work measures 2.25 inches
from base of finger or desired length, ending with a
WS row.
Next Row [RS]: [K1, k2tog] 5 times. 10 sts.
P 1 row.
Next
Row [RS]: [K2tog] 5 times. Break yarn and draw
through remaining 5 sts.
LEFT GLOVE
Shape Lower Palm:
Next
Row [RS]: K to last st, m1, k1.
P 1 row.
Repeat these 2 rows 15 times more. 60 sts.
Thumb:
Next
Row [RS]: K13, turn work and CO 3 sts at
edge of these 13 sts; place marker. This row
is base of thumb. Thumb will be worked over these
16 sts only.
Work thumb sts in stockinette st until work measures
2 inches from base of thumb or desired length, ending
with a WS row.
Next
Row [RS]: [K1, k2tog] 5 times, k1. 11 sts.
P 1 row.
Next
Row [RS]: [K2tog] 5 times, k1. Break yarn
and draw through remaining 6 sts. Remove marker.
Upper Palm:
With RS facing, pick up and k 3 sts along CO edge at
base of thumb, beginning with last CO st and working
towards point where CO edge meets rest of work. From
this point, with RS facing, p all sts on needle. 50 sts.
Continue in stockinette st until work measures 4 inches
from top of cuff, ending with a RS row.
Little Finger:
Next
Row [WS]: P17, place marker, p13, turn work
and CO 2 sts at edge of these 13 sts, place marker;
do not work remaining 20 sts. Little finger will
be worked over 15 sts between markers.
Work these sts in stockinette st until work measures
2 inches from base of finger or desired length, ending
with a WS row.
Next
Row [RS]: [K1, k2tog] 5 times. 10 sts.
P 1 row.
Next
Row [RS]: [K2tog] 5 times. Break yarn and
draw through remaining 5 sts. Remove markers.
Ring Finger:
With WS facing, there will be 17 sts on right needle
and 20 sts on left needle. At beginning of sts on left
needle, you will see CO edge at base of little finger.
*Pick up and p 2 sts along this edge, then p first 6
sts on left needle and place marker. Turn work.
With RS facing, k these 8 sts, then k first 6 sts from
other needle; continuing from these sts, CO 2 sts, place
marker. 16 sts between markers.
Work these 16 sts in stockinette st until work measures
2.25 inches from base of finger or desired length, ending
with a WS row.
Next
Row [RS]: [K1, k2tog] 5 times, k1. 11 sts.
P 1 row.
Next
Row [RS]: [K2tog] 5 times, k1. Break yarn
and draw through remaining 6 sts. Remove markers.*
Middle Finger:
With WS facing, there will be 11 sts on right needle
and 14 sts on left needle. At beginning of sts on left
needle, you will see CO edge at base of ring finger.
Work from * to * as for Ring Finger, working until finger
measures 2.5 inches or desired length before beginning
decreases at fingertip.
Index Finger:
With WS facing, there will be 5 sts on right needle and
8 sts on left needle. At beginning of sts on left needle,
you will see CO edge at base of middle finger. *Pick
up and p 2 sts along this edge, then p8 from left needle.
Turn work.
With RS facing, k these 8 sts, then k remaining 5 sts.
15 sts.
Work in stockinette st until work measures 2.25 inches
from base of finger or desired length, ending with a
WS row.
Next Row [RS]: [K1, k2tog] 5 times. 10 sts.
P 1 row.
Next
Row [RS]: [K2tog] 5 times. Break yarn and draw
through remaining 5 sts. |