CABLES
“… the unaccustomed
terms of back twist and forward twist made
themselves gradually at home in my brain,
the oiled wool slipped through my fingers, “… the
sun beat down upon it all, and thus my dream
began. Not quite a dream, but a strong
feeling that my fingers knew quite well what
they were about, and welcomed the chance to
be about it again after a long lapse of time.
I knew then that I had been through this before,
with younger fingers in a ruder boat, rocked
on the salty summer waves of the Atlantic off
the Irish coast…” – Elizabeth
Zimmermann, Knitter’s
Almanac
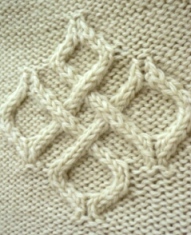
A knitted cable is accomplished by knitting
the stitches out of order. In other words you
make a simple cable with four stitches by knitting
the second two stitches first then the first
two stitches second. This can make your knitting
resemble ropes, braids or loosened knots.
Cable patterns usually
consist of stockinette stitches on a reverse
stockinette background in order to “raise” the
cables off the surface, giving them an embossed
appearance.
Cables can be made by utilizing a special
tool called a cable stitch holder …
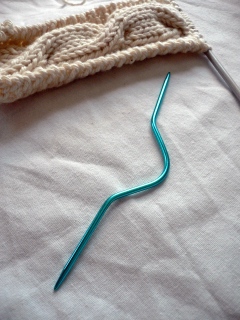
… an extra double point needle or - as I’ll be showing you
a bit further on - with no special tools at all!
Let me say right away
that once you learn the basic method of creating
a cable – getting
those stitches knitted “out of order” – no
cable will be too complicated for you. Not
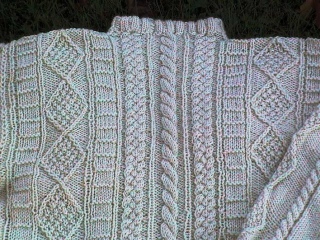
even these…
Morrigan [designed by Jenna Wilson, from
the book No Sheep for You]
Knit and photographed
by Laura Prescott
The only difference
between creating this masterpiece and working
the simple 6 stitch cable I’m about
to show you is that the former takes a bit
more patience. (Well, patience, good organizational
skills and a hefty dose of willpower.)
A few more facts about cables:
1. Cables make a dense fabric
that is significantly less yielding than regular
stockinette. This means that more ease is required
in a heavily cabled garment than in one without
cables.
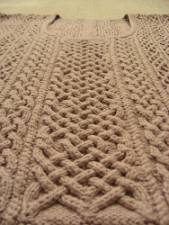
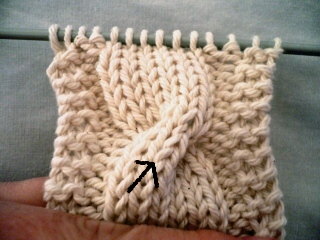
2. Cables “pull in” laterally
which affects stitch gauge significantly. In
other words a heavily cabled sweater will have
you casting on many more stitches than the
same sized sweater knit in stockinette. (Of
course, this also means that you’re going
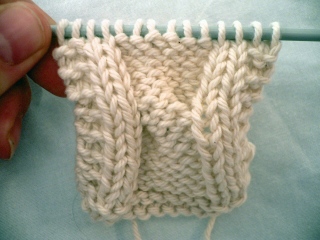
to need more yarn!) Here you can see the tendency
of cables to pull in at the point where the
cable was made:
3. Since cabled garments
are quite dense, they require a yarn that
is NOT. The yarn needs to have a certain
springiness or “bounce”.
Wool has this bounce naturally, while things
like 100% cotton or silk do not. A cabled sweater
knit in 100% cotton -- which tends to be dense
and inelastic -- will be enormously heavy and
stretch lengthwise rather than hold its shape.
(If you are interested in knitting in non-animal
fibers, I cannot recommend our beloved editor’s
book No Sheep For You highly enough.)
And now down to business. We shall be making
a simple 6-stitch cable with both a front cross
and a back cross.
Front cross cable
A “front cross” cable simply means
holding the stitches that are “waiting” to
be knit in front of the work. Front cross cables
are said to twist to the left, which simply
means that the stitches on top in the finished
cable seem to veer off to the left.

A six-stitch cable
consists of 6 stockinette stitches. Some
stitch dictionaries will say a 6 stitch cable
is made on a panel of 10 stitches – this
includes the two purl stitches that are customarily
on either side of the 6 knit stitches in the
center.
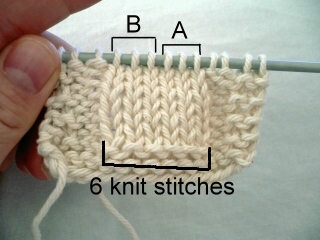
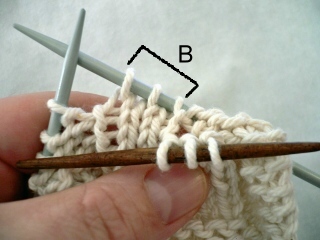
Knit to the beginning of the center group
of knit stitches.
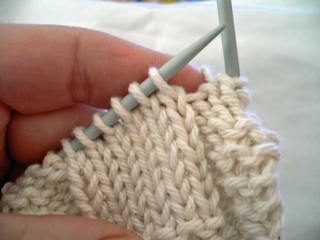
Slip the first 3 stitches (A) to a spare double-point
needle (or cable stitch holder) and hold these
stitches in front of the work.
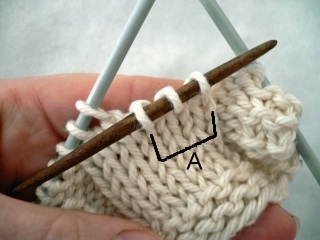
Ignoring the three stitches being held on
the extra needle for the moment, knit the second
3 stitches (B).
Then knit the three stitches that were being
held on the extra needle.
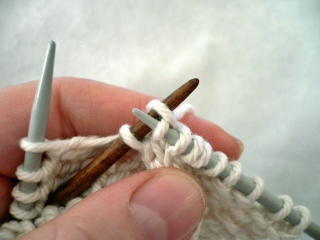
Voila! One front cross
cable completed. Let’s
do one back cross cable before we get sneaky
and throw out our cable holding needle, shall
we?
Back cross cable
The entire process
is the same, except you’ll
be holding the needle with the waiting stitches
at the BACK of the work, like so:
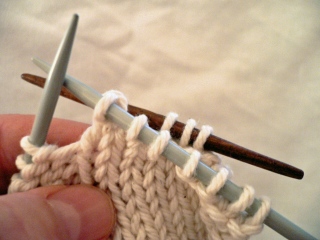
Back cross cables always twist to the RIGHT.
The loose purl stitches issue
One of the most common problems with cabling
is that the purl stitches immediately following
the crossing can be quite loose due to the
strain of the crossed stitches.
This can,
in extreme cases, make the cabled stitches
warped and leave small open areas to the left
of your cables. One way to correct this is
to make it a habit of giving the yarn an extra
tug while working the first couple of purl
stitches…
…to make sure
the purl stitches sit nice and snug up against
the cable.
Another option is to twist the purl stitches
by knitting them through the back loop.
Cabling without a cable needle
Now that we’ve got
cabling down, let’s
go one step further and talk about cabling
without that extra needle for holding the waiting
stitches. It does require a bit of faith – faith
that your knitting won’t immediately
unravel completely when you pull your needles
out. A bit of faith in your ability to pick
up stitches if they did drop is also
helpful.
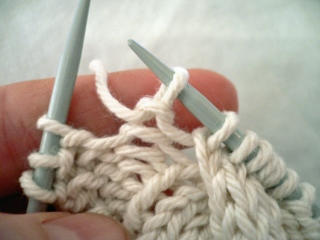
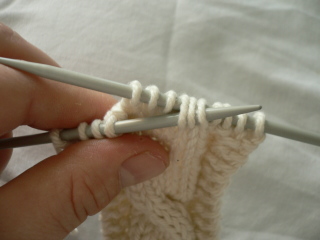
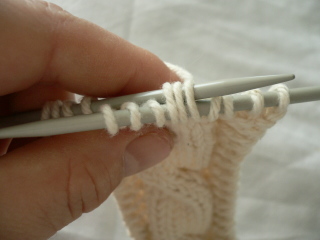
Front cross cable without a cable needle:
Knit to the stitches to be cabled. Slip them
ALL to the right-hand needle as if to purl
(one at a time or as a group, either way is
fine.)
Insert the left-hand needle into the stitches
that would otherwise be held on the extra
needle from the front…
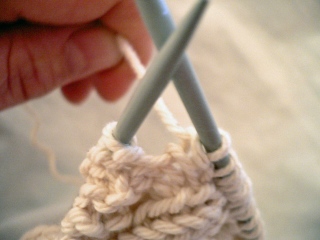
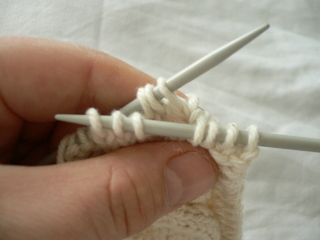
… and then – take a deep breath
- remove the right-hand needle from all the
stitches, which will leave half the stitches
kind of hanging in space. It will be ok. They
won’t go anywhere if you keep your head
and work quickly.
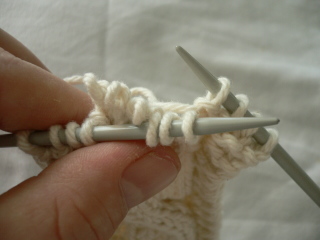
Reinsert the right-hand needle into the needle-less
stitches:
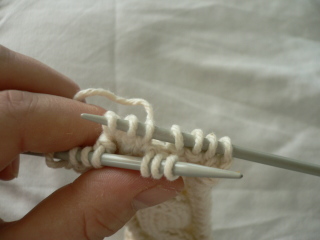
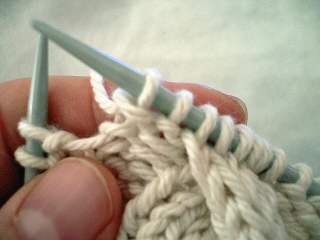
Now pull your needles apart enough to slip
all the stitches that have not been knitted,
one at a time, from the right-hand needle to
the left-hand needle.
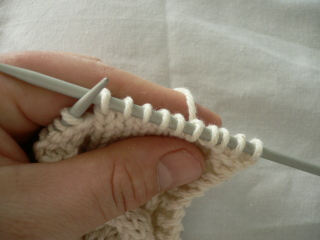
What you have accomplished
here is the cable cross without having knitted
it yet. The only step left is to knit those
stitches! They are all going to seem very
tight, but press on and you’ll wind
up with a lovely front cross cable without
having to hunt through your knitting junk
drawer for your cable needle.
Back cross cable without a cable needle:
Again, knit to the stitches to be cabled.
Slip them to the right hand needle and then
reinsert the left hand needle into the stitches
that would otherwise be held on the extra
needle but this timefrom the back and into
the back loop of the stitches …
Pull the right-hand needle out and reinsert
it into the needle-less stitches, which will
now be in front.
Slip the un-knitted stitches from the right-hand
needle to the left-hand needle and knit over
all.
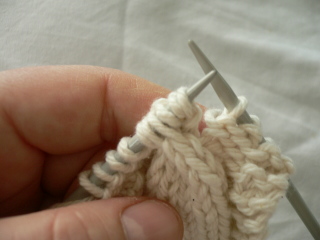
And now you have a finished right twist cable!
Resources:
Knitting
in the Old Way by Priscilla Gibson-Roberts
A
Treasury of Knitting Patterns by Barbara
G. Walker
|